Ingredients:
550 mL chicken stock, warmed
185 mL white wine or vermouth
200 g aborio rice
2 cooked chicken breasts, sliced (or just use left over roast chicken)
2 cloves of garlic, minced
1 bunch of asparagus
1 onion, diced
1 stick of celery, diced
1/2 handful mushrooms, sliced
2 knobs of butter
extra virgin olive oil
sea salt
freshly ground black pepper
Heat a knob of butter and a splash of olive oil in a large saucepan over medium-low heat. Fry onion, garlic and celery for 10-15 minutes or until soft. Crank the heat. Add the rice and fry for a minute, stirring frequently. Add the wine and reduce. When it's almost gone, drop the heat and add a ladle of stock and asparagus. Season with salt and pepper. Add the stock ladle by ladle--you might not need all of it, so don't add it all at once--letting each ladleful reduce considerably before adding the next. After 15 minutes, stir in the mushrooms and chicken. It'll probably be 5 minutes or so before the rice is cooked--you can tell it's done when it has just a little bit of bite left to it. Risotto is a creamy dish, but that's not to say the rice should be cooked until its goo. When the rice is cooked, add the final knob of butter, stir in, cut the heat and clamp the lid down. Steam for a couple of minutes and then serve, seasoning with sea salt, freshly ground black pepper and a glug of extra virgin olive oil.
Thursday, February 26, 2009
Wednesday, February 25, 2009
Beef and muscat sausages
This represents my third attempt at sausage-making. The results weren't brilliant, but they were definitely acceptable. I wouldn't be pissed off if I'd paid for these, is the point. The muscat was a bright idea I had half way through making the sausages. I was originally aiming for a 'barbecue beef' sausage--thus the choice in spices.
Before hanging sausages, you need to twist them into individual sausages, right? Sounds like a challenge, but it's quite easy once you get the hang of it. Personally, I find it easiest to work in metre lengths. I take great care not to overfill the casings and then, when I have a metre-long sausage, I cut it. I fold the metre long sausages in half and then twist the two halves together, starting from the top, about 15 cm from the initial fold. I then feed one of the ends through the hole and repeat the process. Don't simply twist them together, as they'll come undone the moment you let go. It's very important to feed the one of the ends through the hole you just made.
Finally, a word on hanging. I form the twisted sausages into a bundle and then tie food-safe string to them. I place the whole lot in a plastic bag. I tie the other end of the string to a small object--a piece of cutlery would do the job--and then lift up the second last shelf of the fridge. I feed the string in so the small object sits on top of the shelf and the bag of sausages is hanging underneath. I tried using plastic hooks attached to the bottom of the second shelf, but found they didn't have enough strength in their sticky backing.
1 kg chuck steak, trimmed of excess fat and sinew, cut into small strips
500 g pork fat, cut into small strips
natural casings, re-hydrated
a very generous splash of muscat (substitute port or sherry or about anything else)
2 tsp salt
a generous pinch of paprika
a generous pinch of freshly ground black pepper
a generous pinch of thyme
Use the coarsest setting of the mincer to grind up the chuck and pork fat. Combine with the spices and muscat in a bowl and refrigerate until cold. Run the whole lot through the mincer again, this time on the finest setting. Feed into sausage casings. Hand overnight.
Saturday, February 21, 2009
My first attempts at making sausages
Picked up a new toy yesterday--something the packaging calls a multi-purpose 'food turner'. Essentially, it's a pasta machine and a mincer. I already have a pasta machine--never used it, of course--so I'm not particularly interested in the former, but the latter? Can see myself having a whole lot of fun with that.
When I got it home, I sterilised all the components in boiling water and set to work. I had a kilo of boneless pork belly and I minced it up with some salt, pepper and freshly ground fennel seeds. I worked it into some collagen casings and then fried them up. Was I happy with the result? No. The sausages burst. Collagen casings, it seems, aren't the slightest bit forgiving to the sausage maker who dares overstuff his sausages. They were dry as all hell, too.
I took the sausage maker into Saturday school today with the intent of having the kids make sausages. I was right in assuming it'd be right in their collective happy zone, something they'd all go nuts over--turning the crank, forcing the meat into casings, barbecuing or frying them up. To keep it cheap, I went for mutton. You could do these with lamb, though. I also put in some pork fat, to lube them up some. And salt and pepper and curry powder and garlic and onion. The results? Better. Not brilliant, but significantly better. The kids enjoyed them and, yeah, I've had plenty of sausages that were nowhere near as good as these in my lifetime, but there's still a lot of work to be done. Keep that in mind if attempting my recipe.
So yeah, the results. Okay. But still not great. I know why, though, after speaking to a local butcher.
Dryness
Dryness wasn't an issue with the second batch, but the first? Yeah. Big issue. Even though I'd used really fatty meat. The butcher said for maybe a kilogram of meat, he adds about a half cup of very cold (we're talking close to freezing here) water to the mix. Some of it will drain out later.
Casings
Collagen casings work, yeah, but they're hard to tie and they're prone to bursting. Go for the natural casings. That is, pig intestines (you can also get beef and lamb intestines). You'll have to order them 2-3 days in advance, probably, and buy a decent quantity, but that's not a problem. The butcher I go to? He's getting me a bag of casings that'll allow me to make 80-100 kg of sausages. Sounds ridiculous, but the casings are salted. They last forever. All you need to do is take the desired length (which is apparently a bit tricky) and soak it for a while.
Fresh garlic and onion
Okay, if you're planning on cooking your sausages shortly after you make them, using fresh veg isn't a problem. But point is, fresh veg significantly reduces the shelf life of your sausages.
Hanging
Sausages shouldn't be cooked right away. No, they're too fresh, according to the butcher. They're edible, I mean. The results will still be okay if you've done everything else right. But for best results, you should hang them overnight. To do this, keep them in a bundle and hang them in the fridge from a hook. Just remove a shelf or adjust the shelves so you have a large space at the bottom of the fridge. Use one of those hooks with a sticky backing. Hang them either inside a large plastic bag or over a plate, as the excess juices and water will drain out. Unless you have a dedicated fridge, this aspect of the sausage making process will limit the amount of sausages you can output in a single session. There's no point in running 10 kg of meat through your mincer if you only have room in the fridge to hang a couple of kilograms of sausages.
When I got it home, I sterilised all the components in boiling water and set to work. I had a kilo of boneless pork belly and I minced it up with some salt, pepper and freshly ground fennel seeds. I worked it into some collagen casings and then fried them up. Was I happy with the result? No. The sausages burst. Collagen casings, it seems, aren't the slightest bit forgiving to the sausage maker who dares overstuff his sausages. They were dry as all hell, too.
I took the sausage maker into Saturday school today with the intent of having the kids make sausages. I was right in assuming it'd be right in their collective happy zone, something they'd all go nuts over--turning the crank, forcing the meat into casings, barbecuing or frying them up. To keep it cheap, I went for mutton. You could do these with lamb, though. I also put in some pork fat, to lube them up some. And salt and pepper and curry powder and garlic and onion. The results? Better. Not brilliant, but significantly better. The kids enjoyed them and, yeah, I've had plenty of sausages that were nowhere near as good as these in my lifetime, but there's still a lot of work to be done. Keep that in mind if attempting my recipe.
Ingredients:
1 kg mutton, chopped into small cubes
250 g pork fat, chopped into small cubes
collagen casings
4 cloves garlic, minced
1/2 small onion, finely diced
1 tbs curry powder
a good splash of cold water
sea salt
freshly ground black pepper
Mince the mutton and pork fat and transfer to a bowl. Combine with garlic, onion, water, curry powder, sea salt and freshly ground black pepper. Place a handful of the mince at a time into sausage stuffer (which, in my case, is the same device that minced the meat in the first place, just with a different attachment screwed in).
So yeah, the results. Okay. But still not great. I know why, though, after speaking to a local butcher.
Dryness
Dryness wasn't an issue with the second batch, but the first? Yeah. Big issue. Even though I'd used really fatty meat. The butcher said for maybe a kilogram of meat, he adds about a half cup of very cold (we're talking close to freezing here) water to the mix. Some of it will drain out later.
Casings
Collagen casings work, yeah, but they're hard to tie and they're prone to bursting. Go for the natural casings. That is, pig intestines (you can also get beef and lamb intestines). You'll have to order them 2-3 days in advance, probably, and buy a decent quantity, but that's not a problem. The butcher I go to? He's getting me a bag of casings that'll allow me to make 80-100 kg of sausages. Sounds ridiculous, but the casings are salted. They last forever. All you need to do is take the desired length (which is apparently a bit tricky) and soak it for a while.
Fresh garlic and onion
Okay, if you're planning on cooking your sausages shortly after you make them, using fresh veg isn't a problem. But point is, fresh veg significantly reduces the shelf life of your sausages.
Hanging
Sausages shouldn't be cooked right away. No, they're too fresh, according to the butcher. They're edible, I mean. The results will still be okay if you've done everything else right. But for best results, you should hang them overnight. To do this, keep them in a bundle and hang them in the fridge from a hook. Just remove a shelf or adjust the shelves so you have a large space at the bottom of the fridge. Use one of those hooks with a sticky backing. Hang them either inside a large plastic bag or over a plate, as the excess juices and water will drain out. Unless you have a dedicated fridge, this aspect of the sausage making process will limit the amount of sausages you can output in a single session. There's no point in running 10 kg of meat through your mincer if you only have room in the fridge to hang a couple of kilograms of sausages.
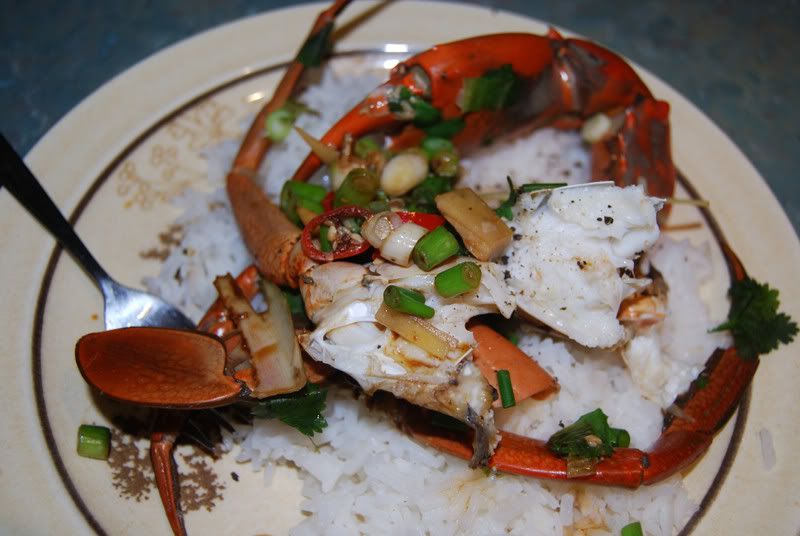
Thai mud crab

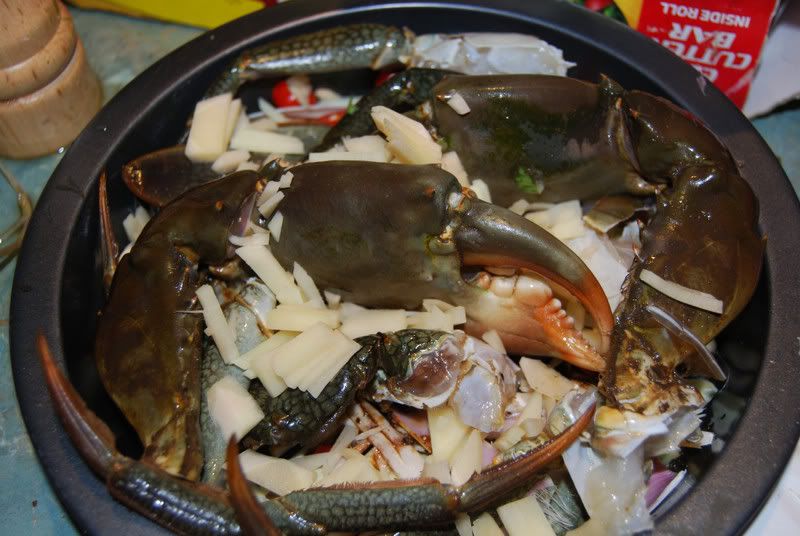
Never had mud crab before this. Had blue swimmer, had spanner. Didn't mind the former but wouldn't bother with the latter again. I was convinced that crab was inferior to bugs, yabbies, prawns and lobster, but still, I'd heard good things about mud crab and felt that I had to give it a go.
You might have to extend the cooking times. The crab I bought was about 600 g. A bigger crab would require a few more minutes, probably. You could use this recipe with other crabs. With blue swimmers, even. Just adjust the cooking time.
Ingredients:
1 live mud crab, about 600 g
4 cloves garlic, minced
3 stalks lemongrass, torn up and bruised
2 small chillies, sliced
1 big lump of ginger, sliced
1 bunch spring onions, sliced
1/2 bunch fresh coriander, leaves picked
a splash of soy sauce
a pinch of brown sugar
steamed rice, to serve
The best way of dealing with the crab is to sit it in the freezer for a hour. If he's not dead by that point, he'll be pretty groggy.
Heat a large saucepan of water on the stove. Sit an appropriately sized bamboo steamer over said saucepan. Meanwhile, take the crab from the freezer. Flip him onto his back and pull at the flap on the belly, ideally working off the shell in the process (if you balls it up, you can just bust the shell open with a sharp knife). Pick out the lungs--those grey, furry things--and get rid of the mustard-looking stuff. Pretty much, with a crab, the inedible stuff looks inedible. Twist the legs and claws off. Give the claws a good whack with the back of your knife, a meat tenderiser, a sharpening steel or pretty much anything to crack them open.
On a small metal plate (I actually used a small pie tin), make a bed for the crab pieces with the lemon grass. Scatter the garlic, ginger and chilli over the crab pieces. Sprinkle over the sugar and add the soy. Don't go nuts with that stuff, as it's pretty potent. Steam for 15 minutes or until the crab is cooked through--the shell will be bright red. Lift the lid of the steamer and scatter the coriander leaves and spring onion slices over the crab. Steam for a further minute. Serve with rice.
Saturday, February 14, 2009
Rabbit pie
Ingredients:
600 g rabbit mince
500 mL rabbit or chicken stock
5 frozen short crust pastry sheets
1 large onion, sliced
4 cloves garlic, minced
2 chillies, diced
1 piece ginger, sliced
1 egg, beaten
1/2 stick lemon grass, sliced
1/2 lemon, juiced
1 tbs coriander seeds, roasted and then ground
1 tbs shrimp paste
2 tsp brown sugar
1 tsp fish sauce
1 tsp turmeric powder
pinch of flour
splash of rice wine (i.e. sake)
generous pinch of sesame seeds
freshly ground black pepper
sea salt
peanut oil
chilli sauce (optional)
Over a low flame, heat some peanut oil in a large saucepan. Add ginger, garlic, onion and lemon grass. When soft, add coriander and turmeric. Stir and fry for a minute, then add the rabbit mince, fish sauce and shrimp paste. Give the mince some colour and then deglaze the saucepan with a splash of rice wine. Add the sugar, flour and stock. Cover and simmer for a hour. Season with freshly ground black pepper, sea salt and, if desired, chilli sauce. Remove from heat and allow to cool.
Thaw pastry. Work into three oven proof ramekins. Trim away excess pastry. If there are any tears, use the off-cuts to patch them up. Ladle the cooled filling into pastry-lined ramekins. Brush some beaten egg around the rim of each pie. Lay another sheet of pastry on top. Trim away excess again. Poke a few holes in the lid of each pie, then brush some egg on top. Sprinkle with sea salt, freshly ground black pepper and sesame seeds. Bake at 180*C for 45-50 minutes.
Friday, February 13, 2009
Amarula chocolate mousse
I rarely bother with desserts, but for Valentine's Day I figured I'd put in the extra effort. Amarula is a South African cream liqueur made from 'the unique fruit of the marula tree'. My girlfriend, being Zimbabwean, has a fondness for this stuff. You can make this mousse with other liqueurs too. Just keep in mind that you may want to reduce the quantities. A single tablespoon of Bailey's, for instance, would most certainly be enough.
170 g good quality dark chocolate, 70% cocoa solids, broken into small pieces
125 mL heavy cream, whipped into soft peaks
4 eggs, separated
60 mL Amarula
50 g butter, cut into chunks
2 tbs white sugar
1/2 tsp cream of tartare
pulp from passion fruit
Heat a little water in a large saucepan until it begins to simmer. Reduce heat. Place a bowl over saucepan and add chocolate. Stir chocolate as it melts to prevent scorching. When melted, add the Amarula and take off heat.. Stir in gently and then add in the butter, chunk by chunk. When fully incorporated, add the egg yolks one at a time.
In another bowl, combine egg whites with cream of tartare. Whisk and whisk and whisk, gradually adding the sugar. When the egg whites hold soft peaks, gently fold egg whites into chocolate mix. Then fold in the whipped cream. Cover and refrigerate for a couple of hours. To serve, spoon carefully into glasses and top with a little passion fruit pulp.
Wednesday, February 11, 2009
Moroccan lamb
I bought very good lamb for this, but one of the cheapest cuts. I'd advise you do the same. Lamb breast is something you'll have to ask for, probably. And probably the butcher will have to get it in. Put it aside, specially. It's a magnificent cut. Fatty--I'd advise hacking away the excess with a knife if you're braising--and full of flavour. It'd go well in a curry or pie. You could separate the ribs and barbecue it. You could roast it. Could do about anything. Cooking it slowly is best though. Don't worry about not having a cleaver. So long as you have a decent chef's knife--a western one, mind--you should have no problem getting through the bones. They're quite small.
Ingredients:
800 g lamb breast, chopped into chunks
500 mL lamb stock (substitute chicken stock, I guess)
400 g can diced tomatoes
handful dried apricots, roughly chopped
handful pitted dates, chopped
a splash of muscat, port or other sweet, fruit-based alcohol
4 pieces preserved lemon, rinsed and drained
4 cloves garlic, minced
1 onion, sliced
1 small piece ginger, grated
1 tbs tomato paste
2 tsp paprika
1 tsp cumin, ground
1 tsp turmeric, ground
1 tsp coriander, ground
1/2 tsp cinnamon, ground
1/2 tsp chilli powder
2 cardamom pods
sea salt
oil
couscous or rice, to serve
In a saucepan, fry the onion and garlic in a little oil over a medium flame until soft. Add the ginger and spices. Stir for a minute, then add the lamb pieces. Brown all over, deglaze with port/muscat, then stir in the tomato paste. Add the canned tomatoes, stock, preserved lemon and dried fruit. Season with sea salt to taste. Simmer, partially covered, on a very low heat for 90-120 minutes. Be sure to stir well every 10-15 minutes to prevent stuff from sticking to the bottom of the pan.
Monday, February 9, 2009
Beef and vegetable stew
This is a very simple stew. It came about after I bought some more skirt steak and had the bright idea of experimenting with another of the fortified wines. After much pacing of the relevant section of the bottle shop, I ended up with a bottle of muscat. Never had the stuff before. It's quite sweet, but not overly so. To my taste, at least, it works perfectly in the dish. Feel free to substitute it for a red wine of your choice, though.
Ingredients:
600 g skirt steak, cut into bite-sized chunks
350 mL muscat
250 mL beef stock
2 sticks celery, cut into chunks
1 carrot, peeled and cut into chunks
1 parsnip, peeled and cut into chunks
1 onion, sliced
4 cloves garlic
2 sprigs of thyme
2 bay leaves
2 tbs tomato paste
freshly ground black pepper
sea salt
oil
In a large saucepan, heat some oil over a medium-low flame. Fry celery, garlic and onion for ten minutes, before adding carrot and parsnip. Cook for a further five minutes, then add the beef. Cook for five minutes. Stir in the tomato paste, then add the muscat, stock, thyme and bay leaves. Season with sea salt and freshly ground black pepper, cover, reduce heat and simmer for one and a half hours.
Sunday, February 8, 2009
Beef and stout pie
Ingredients:
400 g beef skirt or chuck steak, diced
375 mL stout (I used Guinness Extra Stout)
60 mL beef stock
2 tomatoes, diced
1 onion, sliced
2 cloves garlic, minced
2 tsp curry powder
freshly ground black pepper
sea salt
a pinch of flour
a splash of Worcester sauce
a splash of Tabasco sauce
2 sheets puff pastry
2 sheets short crust pastry
1 egg, beaten
a splash of milk
oil
Once cool, pre-heat the oven to 190*C.
Fry the onion and garlic in oil in a saucepan over a low flame until soft. Add curry powder and then, a second later, add the tomato. When tomato is soft, add the beef. Seal on all sides, then add the stout and stock. Season with freshly ground black pepper, sea salt, Tabasco and Worcester. Stir in a pinch of flour. Cover and simmer for 90 minutes. Remove from heat and uncover. Allow to cool.
Line two ramekins with the short crust pastry. Be gentle. Cut away the excess. Spoon in the cooled filling until it is level with the top of the ramekin. Brush the edge of the pastry with a little beaten egg, then lay the puff pastry on top. Prick four holes in the puff pastry. Add the milk to the remaining egg and lightly brush it over the puff pastry. Sprinkle a few poppy seeds on top; Bake until puff pastry is golden and, well, puffy. About 30-40 minutes.
Duck and mushroom pie
This recipe will make for two single serve pies, although it can easily be expanded to make one large pie. Too, a word on stock. I didn't have time to make duck stock and I certainly wasn't going to fork over near $10 for it, so I used a watered down beef stock. Obviously duck stock would make for a superior end product, but it's not disastrous if you don't have any handy.
Ingredients:
300 g diced duck meat (I used various off-cuts from the duck I'd bought the other day)
300 mL duck stock or watered down beef stock
30 mL port
1 small onion, sliced
2 cloves garlic, minced
2 mushrooms, diced
2 tbs fresh thyme, chopped
2 tbs tomato paste
a pinch of flour
freshly ground black pepper
sea salt
2 sheets puff pastry
2 sheets short crust pastry
1 egg, beaten
a splash of milk
a pinch of poppy seeds
oil
Fry the onion and garlic in oil in a saucepan over a low flame until soft. Stir in the tomato paste. Add the duck meat and seal for just a few seconds, before adding the port. Follow with the stock and thyme. Season with freshly ground black pepper and sea salt. Add a pinch of flour. Simmer, with the lid on, for 45 minutes, stirring occasionally. Add the diced mushrooms. Simmer, with the lid on, for a further 30 minutes. Take off the heat and remove lid. The gravy will thicken considerably as it cools.
Once cool, pre-heat the oven to 190*C.
Line two ramekins with the short crust pastry. Be gentle. Cut away the excess. Spoon in the cooled filling until it is level with the top of the ramekin. Brush the edge of the pastry with a little beaten egg, then lay the puff pastry on top. Prick four holes in the puff pastry. Add the milk to the remaining egg and lightly brush it over the puff pastry. Sprinkle a few poppy seeds on top; Bake until puff pastry is golden and, well, puffy. About 30-40 minutes.
Saturday, February 7, 2009
Duck breasts seasoned with juniper berries and Sichuan peppercorns, served in sourdough with a summer salsa
Ingredients:
2 boneless duck breasts, skin-on
4 slices sour dough, rubbed with a little extra virgin olive oil and lightly toasted
4 vine-ripened cherry tomatoes, diced
1 small red onion, diced
1/2 Lebanese cucumber, peeled, de-seeded and diced
1/4 orange, juiced
1 tbs finely chopped flat leaf parsley
2 tsp juniper berries, freshly ground
2 tsp Sichuan peppercorns, freshly ground
sea salt
extra virgin olive oil
Season the duck breasts with the juniper berries, Sichuan peppercorns and sea salt. Drizzle with a little oil.
Pre-heat oven to 220*C.
Pre-heat a fry pan over a high heat. When hot, add the duck breasts, skin side down. Seal for just a minute, then flip over. After a minute, transfer pan to the oven and roast for 7-8 minutes. Take duck breasts out of pan and rest for at least five minutes.
Prepare the salsa by tossing the vegetables together. Sprinkle them with a little salt and mix in the orange juice.
Spoon salsa onto two slices of bread. Add duck breasts on top.
Thursday, February 5, 2009
Authentic tacos
Ingredients:
400 g skirt steak
6 soft tortillas
2 limes, juiced
2 tomatoes, diced
1 red onion, diced
1 clove garlic, very finely minced
1 bunch coriander, leaves picked
1 jalapeno, de-seeded, diced
1/2 cucumber, peeled, de-seeded and diced
2 tsp cumin seeds, ground
freshly ground white pepper
sea salt
peanut oil
Season steak all over with sea salt, freshly ground white pepper and cumin. Set aside for a half hour to come up to room temperature. Drizzle a little peanut oil over one side.
Pre-heat a fry pan over high flame. Cook steak, oiled side down, for one minute. Turn. Cook for a further minute. Drop heat to low. Cook for a minute. Turn and cook for a final minute, then set aside. Rest steak while you prepare the vegetables.
In a bowl, toss together the tomato, onion, garlic, coriander leaves, jalapeno and cucumber. Add the lime juice and a pinch of sea salt.
Warm tortillas according to packet instructions.
Slice the steak into small strips.
Fill tortilllas with steak and vegetables. Don't overfill, otherwise it'll go everywhere when you try and eat it.
Wednesday, February 4, 2009
Pork chops with a bourbon and Cajun spice coating
Ingredients:
4 pork chops
2 tsp white pepper, freshly ground
1 tsp smoked paprika
1 tsp dried basil
1 tsp garlic powder
1 tsp onion flakes
1 tsp salt
1 tsp dried parsley
1 tsp dried thyme
1/2 tsp chilli powder
1/4 tsp cinnamon, ground
a little bourbon
Ensure all spices are very finely ground. Combine in a cup or other small vessel. Add just enough bourbon to form a thick paste. Rub this into the pork. Set aside for a hour. Barbecue or broil until cooked through.
Tuesday, February 3, 2009
Onion and red wine vinegar sauce for beef, emu, kangaroo or venision
This is a very simple sauce for red meat.
Ingredients:
1 onion, sliced
2 cloves garlic, crushed
2 tbs red wine vinegar
1/2 tsp whole mustard seeds
freshly ground black pepper
sea salt
olive oil
Heat some olive oil in a small fry pan. Add the mustard seeds. When they start to pop, add the onions and garlic. Fry for five minutes, then add the red wine vinegar. Season to taste with freshly ground black pepper and sea salt. Simmer until onions are very soft. Transfer everything into the bowl of a food processor and blitz until smooth. Drain sauce to remove excess liquid and then spoon a small amount next to each piece of meat.
Curried veal wraps
I picked up a tray of diced veal the other day on special. A couple days from the best before, see. I was originally intending on a curry, but today I realised I couldn't be bothered. Something I didn't need to simmer for a hour or so would be better.
Ingredients:
300 g diced veal
4 tortillas or large chapattis, warmed
2 tomatoes, diced, seasoned with sea salt and freshly ground black pepper
2 cloves garlic, sliced
1 large onion, sliced
1 lump ginger, diced
1 tsp coriander seeds, ground
1 tsp chilli powder
1 tsp turmeric powder
1 tsp sweet paprika
1/2 tsp cumin seeds, ground
4 cloves, ground
freshly ground black pepper
peanut oil
yoghurt, to serve
A few hours before cooking, put the veal, all the ground spices and some freshly ground black pepper in a zip lock bag. Shake to cover the meat evenly and then refrigerate.
Heat oil in a fry pan over a medium low flame. Fry the onion, garlic and ginger until they begin to soften. Add the tomato. Stir and fry until tomato has softened. Add the seasoned veal. Stir and fry until veal is cooked medium rare. Spoon into tortillas. Add a couple of spoonfuls of yoghurt.
Monday, February 2, 2009
Hot goat curry
Ingredients:
400 g boneless goat meat, diced
4 garlic cloves, sliced
1 onion, sliced
1 piece ginger, sliced
1 tomato, diced
1 bunch coriander
1 tbs black pepper, ground
1 tbs chilli powder
1 tbs coriander seeds, ground
1 tsp turmeric powder
6 cardamom pods, ground
6 cloves, ground
1 star anise, ground
30 mL apple cider vinegar
ghee or oil
hot chilli sauce, to taste
Heat ghee or oil in a small saucepan. Fry onion, garlic and ginger until soft. Add ground spices. Fry for a couple of minutes. Add tomato and about a tablespoon's worth of chopped coriander stems. Fry for five minutes and then add the goat meat. Brown on all sides, then add the apple cider vinegar. Cook for a minute then add 400 mL water. Season with salt and chilli sauce. Simmer for one hour--cover the pan for the first 45 minutes, then remove the lid for the final 15 minutes of cooking. Add coriander leaves for the final 10 minutes.
Simple avocado dip
This dip is very simple. I first made it on one of those lazy days--I was tired from work and really couldn't be bothered mucking about with straining and whisking yoghurt or grinding spices. I had an avocado. I had fresh chilli and garlic. Tabasco, too. What else did I need?
I used this as a dip for raw carrot and cucumber. You could use it for chips or about anything. Could even throw it into tacos or burritos or any of those tortilla-wrapped delights.
Ingredients:
1 large, ripe avocado
2+ fresh chillies (to taste)
2 cloves garlic, peeled
a splash of Tabasco
freshly ground black pepper
sea salt
Cut the avocado in half. Peel the skin off and remove the stone. Tear the flesh into chunks and drop it into the bowl of a food processor, along with the garlic and two chillies. Blitz until smooth. Season with freshly ground black pepper, sea salt and Tabasco. Blitz. Add more chillies if desired.
Sunday, February 1, 2009
Pork chops with honey mustard glaze
I picked up a roll of Otway pork this morning. Otway pork is reared free-range. The way pork is supposed to be reared. I wanted to sample some with a fairly simple, mild-flavoured sauce or glaze, so here is what I came up with:
1 free-range pork chop
2 tbs mustard powder
1 tbs whole mustard seeds
a glug of honey
a splash of Tabasco
a splash of Worcester sauce
freshly ground black pepper
sea salt
In a small vessel, mix with mustard powder with enough water to form a paste. Add the whole mustard seeds, honey, Tabasco and Worcester. Season with sea salt and freshly ground black pepper. If it's a bit thin, add more mustard powder. Conversely, if it's a bit dry add a touch more water.
Rub the glaze all over the pork chop. Set aside for a hour.
Pre-heat the broiler to medium high. Broil pork chop until done, turning frequently to prevent the honey from burning. When pork chop is just cooked, place on a plate and cover with foil. Set aside for five minutes.
You can use this 'marinade' with about any cut of pork--just adjust quantities as necessary.
Chilli con kangaroo
This is my take on chilli con carne, the Texan dish that--as the name suggests--combines chilli and meat. Chilli--as in the dish, not the plant--isn't seen too often on Australian tables. Indeed, I suspect many Australians don't know what it is. Essentially, chilli a dish that's akin to Bolognese sauce in texture. Meat--typically beef--beans and tomatoes form the base of most chilli recipes. There are notable exceptions, of course. And yeah, too, there's obviously chilli. As in the fruit. You can use it in dried, fresh or pickled form.
Ingredients:
400 g kangaroo mince
400 g can cannelini beans, rinsed and drained
400 g can whole tomatoes
4 cloves garlic, sliced
2 bay leaves
2 small, fresh chillies, diced
1 capsicum, diced
1 onion, sliced
125 mL beer
1 tbs smoked paprika
1 tbs whole allspice berries
1 tbs whole black peppercorns
1 tbs whole cumin seeds
1 tsp brown sugar
1/2 tsp whole cloves
sea salt
Tabasco, to taste
oil
grated cheese, to serve
pickled chilli to serve
sour cream, to serve
steamed rice, to serve
Heat oil in a saucepan. Fry onion and garlic until soft.
Meanwhile, roast the bay leaves, allspice, black peppercorns, cloves, cumin and paprika in a small, non-stick saucepan over a low flame. When nicely pungent, grind in a mortar and pestle. Set aside.
When the onions and garlic are soft, add the capsicum and fresh chillies. Fry for five minutes, then add the kangaroo mince, ground spices and brown sugar. Brown the meat, then add the entire contents of the tomato can (i.e. the juices as well as the tomatoes) and the beer. Simmer, uncovered, for 30 minutes.
Add the beans. Simmer for a further 20 minutes. Season with sea salt and Tabasco. Serve.
Friday, January 30, 2009
Goat kebabs with a spiced sour cream dipping sauce
Here's another recipe for goat kebabs. Again, to get the necessary boneless meat it's best to ask the butcher to bone out a whole leg and dice the remaining meat. Retain the bone for stock.
Ingredients:
200 g boneless goat meat, cut into a 1.5 cm dice
150 g sour cream
2 small chillies
2 cloves garlic, peeled
1/2 onion, cut into quarters with slices separated
a handful of cherry tomatoes, cut in half
2-3 tablespoons of fresh coriander (a mix of leaves and stems)
1 tbs whole cumin seeds, lightly roasted
freshly ground black pepper
sea salt
olive oil
Thread the goat, tomato and onion onto metal skewers (if you only have bamboo ones, you'll need to soak them in water prior to use to prevent burning). Season with freshly ground pepper, sea salt and olive oil. Refrigerate for a hour.
Pre-heat the broiler or barbecue to medium low. Cook the goat kebabs for 20-25 minutes or until cooked through, basting occasionally with a little oil.
Meanwhile, prepare the dipping sauce by blitzing the coriander, chilli, cumin and garlic in a food processor. Whisk in to sour cream. Season to taste with salt and black pepper.
Goat kebabs with a sherry and paprika marinade
These are very simple kebabs. You could jazz them up with some fresh herbs, garlic, chilli powder or about anything else. Me, I couldn't really be bothered. I had some sherry I wanted to use up and wanted to do something dramatically different to the other lot of goat kebabs I'm doing today. You can barbecue them, broil them or even roast them. Either way, be careful not to overcook them. Goat meat is quite lean. It won't withstand as much punishment as, say, lamb. And yes, you can make these with lamb if you're unable to source goat. Could use mutton too, I suppose.
To get boneless goat me, I bought a whole goat leg. I asked the butcher to bone it out and cut it into a 1.5 cm dice.
Ingredients:
200 g boneless goat meat, cut into a 1.5 cm dice
125 mL dry sherry (no need to measure it, just eyeball it)
1/2 onion, cut into quarters with slices separated
a handful of cherry tomatoes, cut in half
1 tbs sweet paprika
a generous slash of sherry vinegar
a splash of olive oil
a freshly ground black pepper
sea salt
Thread the meat, tomato and onion onto skewers. If you're using bamboo skewers, you'll have to soak them in water prior to use to prevent burning. Me, I make things easier by using metal skewers. I picked up some nice, long ones for a couple of dollars at the local discount shop. Once the kebabs are prepared, sit them in an oven tray (you can use any tray, really, but I used an oven tray as it was just the right size). Season with black pepper and paprika, then add the sherry, sherry vinegar and olive oil. Cover and refrigerate for a couple of hours at least. Open the cling film every so often to spoon the liquid ingredients over the meat. Just before cooking, sprinkle generously with sea salt.
Cook on or under a medium-low heat for 20-25 minutes, turning and basting frequently with the marinade.
Thursday, January 29, 2009
Emu fan fillet sandwiches
I really like emu. It has a magnificent, meaty flavour. Not as strong as kangaroo or venison, even, but still very nice. I bought a kilogram of fan fillet the other day, so twice over the next few weeks you'll see emu recipes appear. I had the butcher cut the piece into three. I'll have to try a curry with one of the pieces. The other piece? No idea at this stage. A thought that occured just now, though, is a sort of 'coat of arms' pie. That'd be a whole lot of fun. Particularly if I could season it with native stuff like mountain pepper. Stay tuned, kids.
Anyway, this sandwich. It's essentially a steak sandwich, only with emu instead of beef. You could make this with beef. You could make this with buffalo. With ostrich. With kangaroo. You could add a bit more vegetable matter. Maybe take those lovely pieces of onion that have absorbed the flavour of the red wine and lay them on top of the fan fillet. Go crazy. I mean, it's meat in bread, you can't really ruin it.
Ingredients:
4 slices of sour dough or other good quality bread
4 slices beetroot
2 150-175 g pieces of emu fan fillet
1 quantity thick red wine and garlic sauce
a small handful of baby spinach leaves (could use rocket here, I guess)
a little olive oil
freshly ground black pepper
sea salt
A half hour before cooking, remove the emu from the fridge to get it up to room temperature. Season generously with sea salt and freshly ground black pepper. Drizzle a little olive oil on top, too.
Pre-heat the fry pan to smoking hot. You could use a barbecue, of course. Could even toast the bread over the grill. Just be careful not to burn it. When hot, add the emu fan fillet pieces. Cook for two minutes on each side and then transfer to a plate. Wrap in foil and let rest for five minutes.
Meanwhile, prepare the bread. Rub a little olive oil into it and toast it lightly. When toasted, top two of the slices with the baby spinach leaves and beetroot slices. When the fan fillet has rested enough, add to the sandwich. Then pour over the sauce. Now, you might've figured this is the kind of steak sandwich you eat with a knife and fork. You'd be right, there. So maybe sex it up a bit with a garnish. Preferably something more interesting than the very 90s sprig of continental parsley, mind.
Thick red wine and garlic sauce
This sauce is suitable for all manner of red meats--beef, buffalo, kangaroo, emu, venison and, yeah, about anything else that's red and meaty. It's based on a Charlie Trotter recipe. His recipe used as much garlic with a whole bottle of wine, but here I wanted a much stronger garlic flavour. Too, I didn't use the capsicum or celery his recipe called for. And, yeah, substituted sherry vinegar for his balsamic, as it seemed--for no particularly compelling reason--right.
Ingredients:
250 mL red wine (I used cab sav)
1 tbs butter, softened
1 tbs port
1 tbs sherry vinegar
6 cloves garlic, sliced
2 bay leaves, torn
1 onion, sliced
1 tomato, diced
a splash of olive oil
freshly ground black pepper
sea salt
Heat some oil in a small saucepan. Fry the garlic and onion until soft. Season with sea salt and black pepper. Add the bay leaves, tomato, port and sherry vinegar. Reduce until the liquid is almost gone. Keep seasoning with salt and black pepper. Add the red wine and reduce by half. Take saucepan off heat and pour through a sieve into a jug or other vessel. Use a spoon to squeeze all the liquid you can out of the garlic, onion and tomato. Stir butter into the sauce and season again, if necessary.
Wednesday, January 28, 2009
Australian burgers
Ingredients:
400 g kangaroo mince
4 damper rolls, split and warmed
4 slices beetroot
4 slices cheese (I used cheddar)
4 slices pineapple
1 red onion, sliced
1 tomato, sliced
a handful of lettuce leaves
freshly ground black pepper
sea salt
Tabasco, to taste
Worcester sauce, to taste
The day before, combine the kangaroo mince with however much black pepper, sea salt, Tabasco and Worcester sauce appeals. Form the mince into four patties and place on a plate. Use your thumb to make an indentation in each patty. Cover and refrigerate.
Add fillings to the rolls in the following order (from the bottom): lettuce, beetroot, pineapple, cheese, kangaroo, onion and tomato.
Tuesday, January 27, 2009
Beer damper rolls
In years gone by, people in Australia's bush would make a simple bread from flour and water. That's how we made it in scouts, anyway. That's how we were told it was made. Most recipes you see online, though, use milk in place of water. I'm not sure which is authentic as, really, I use neither milk nor water and, as a general rule, I care more for flavour than authenticity.
When I made these rolls, it was to use them as burger buns. If you want to make a large loaf or dinner rolls or anything in between, you could easily do so by portioning the dough differently. You might have to adjust the cooking time too.
Ingredients:
500 g self-raising flour, sifted
350 mL beer
50 g salt-reduced butter, chilled and cut into cubes
1/2 tsp white sugar
a pinch of fine sea salt
a splash of milk
Pre-heat oven to 190*C.
In a large bowl, combine the flour, sugar and salt. Add the butter cubes, too. Rub them into the flour as if you're making pastry or scones. Once the butter and flour are well combined, add the beer. Mix with your hands. Form the dough into a ball. If it's sticky, add a bit more flour.
Split the dough into four evenly sized pieces. Roll them into balls. Place the balls as far apart as possible on a lightly greased oven tray. Brush balls with a little milk. Bake for 25 minutes or until golden.
Monday, January 26, 2009
Barbecue chicken burgers
I didn't barbecue these burgers, so perhaps they shouldn't be really be called 'barbecue' anything. No, it was a bit too hot for me to be up for wandering down to the local park to gather the necessary wood. In an attempt to give them a barbecue flavour, though, I added a few drips of liquid smoke, a product my house mate picked up from USAFoods, to both the sauce and the burger patties during cooking. It's nowhere near as good as the real deal, of course, but when one is lazy one can't be fussy. Too, the secret behind making burger patties that don't fall apart in the pan or on the barbecue is to form the patties the night before and refrigerate them and then to cook them gently. There's absolutely no need to add egg, onion or bread crumbs to a burger patty.
Ingredients:
500 g chicken mince
4 burger buns, opened and lightly toasted under the broiler or on the grill
4 slices pineapple (well-drained if from a can)
2 cloves of garlic, minced
1 tomato, sliced and seasoned with sea salt and freshly ground black pepper
1 onion, sliced
a handful of rocket leaves, washed and drained
1/4 cup tomato ketchup
a shot of whisk(e)y
1 tbs Dijon mustard
1 tsp apple cider vinegar
1 tsp smoked paprika, plus extra to season
freshly ground black pepper
sea salt
hot sauce of your choice (I recommend a chipotle sauce, for its smoky flavour)
oil
A few hours, but preferably a day, before cooking the burgers, add a few drops of hot sauce, a pinch of paprika and a generous dose of freshly ground black pepper to the mince. Form the mince into patties. Don't make them too thin--if you're even close to McDonald's-style patties, you've overdone it. A good patty is just about 2 centimetres thick. Place the patties on a plate. Use the back of a teaspoon or the tip of your thumb to make a shallow indentation in the centre of each patty. Cover and refrigerate.
A half hour before cooking, take the patties out of the fridge and let them come up to room temperature. It's always important to do this when cooking meat, no matter your plans for it--roasting, barbecuing, frying, steaming--as it'll make for more even and marginally quicker cooking.
To make the sauce, fry the onions in a little oil for five minutes. Add the garlic. Fry until the onions are nicely caramelised, then add the shot of whisk(e)y. Once reduced, add the tomato ketchup, Dijon mustard, paprika and apple cider vinegar. Season to taste with sea salt and freshly ground black pepper. Cook for ten minutes over a low heat.
Fry the chicken patties in a little oil. Keep the heat low. Don't move them more than necessary. Season with sea salt and freshly ground black pepper as they cook. When cooked, add the patties to the lightly toasted buns with the rocket leaves, pineapple, tomato and sauce.
Sunday, January 25, 2009
White bread
I've always meant to get around to making my own bread. And today, today of all days, when it's thirtysomething degrees outside--Celsius, for my American readers--I finally had a crack at it. This recipe produces one round loaf. There's nothing stopping you from splitting the dough into small rolls or a rectangular loaf. Too, there's nothing stopping you from modifying it considerably. Feel like adding nutmeg or cinnamon? Fresh herbs? A topping of grated cheese, diced bacon (pre-cooked, of course) and sun-dried tomatoes? A Spanish-style dusting of paprika? Olives? Go right ahead. This bread is lovely made as detailed below, but it'd be far more exciting if you experimented with it.
Ingredients:
550 g strong plain flour
30 mL olive oil, plus extra to grease
1 tbs white sugar
3 tsp dry active yeast (about one and a third sachets)
1/2 tsp fine sea salt
sesame seeds or poppy seeds
Combine the yeast and sugar with 350 mL warm water in a large bowl. Be 'warm' I mean somewhere between 40 and 50 degrees Celsius. While yeast will die if you put it in hot water, there's no need to treat bread-making like a science experiment. Close enough will do.
When the yeast water is foamy--about ten minutes--add in two cups of flour, the olive oil and the sea salt. Set to work on the mix with an electric mixer fitted with dough hooks. Of course, you could just as easily do this by hand or in a food processor with the mixing blade. Gradually add the rest of the flour, keeping the mixer on the lowest or second lowest setting if you want to avoid getting flour all down your front. You want a ball that comes away from the side of the bowl and holds together nicely.
Take the dough ball out of the bowl and work it around in your hands for ten minutes. This part of bread-making is excellent for stress relief. Stretch it, squash it, roll it. I prefer to knead dough in my hands--it makes for less mess and seems to produce the same results as needing it on a board. Once the dough is smooth and has an elastic texture, transfer it to a clean bowl that has been lightly greased with olive oil. Turn the dough ball over so it is completely covered in the finest film of olive oil. Place a damp but clean tea towel over the bowl. Keep the bowl somewhere warm for two hours so the bowl can rise. Next to a window would be good. If it's cold, you could always turn on the heat lamp in the bathroom and close the door.
After two hours, transfer the dough ball to a lightly greased circular roasting pan. My pan was about 18 cm across. Ensure that the dough is of uniform thickness and then let the dough sit for another half hour or so in a warm place without a tea towel. The surface will dry out slightly. Pre-heat the oven to 200*C. Brush the surface of the dough with warm water--use only a little, please--and then give a generous sprinkling of either poppy seeds or sesame seeds. Bake for 20-25 minutes. The surface of the bread should be golden and should make a satisfying hollow sound when you rap on it with your knuckles. Transfer the bread to a wire rack to cool. Don't keep it in the hot oven pan. Serve however you please while still warm. Retain any leftovers for bread crumbs, which can be frozen until required.
Saturday, January 24, 2009
Vegetarian couscous
Believe it or not, but I do eat vegetarian meals on occasion. I really enjoy vegetables that rarely grace the tables of my fellow Aussie. These vegetables are so flavoursome. This dish can, of course, be made with about any vegetable you care to throw in it. Some cherry tomatoes would be nice. Particularly if you roasted them beforehand, I reckon. Mushrooms would be lovely. Parsley. Spinach. Corn. Chilli. Zucchini. Broccoli. Note that with some vegetables, it'd be a good idea to cook them at least partially beforehand. Too, this recipe makes a large quantity. If you have a small wok, you may need to cook it in two batches. Luckily, the final stage, which sees the couscous and fennel, both of which have been cooked already, come together with everything else is very short.
Ingredients:
2 cups couscous (about 400 grams)
4 cloves garlic, minced
2 handfuls of endive leaves, chopped
2 dried chillies
1 capsicum (bell pepper), diced
1 carrot, diced
1 fennel bulb, sliced
1 tbs whole cumin seeds
1 tbs whole fennel seeds
1 tbs sumac powder
freshly ground black pepper
sea salt
extra virgin olive oil
olive oil
Prepare the fennel. Heat some olive oil in a saucepan and fry the dried chillies and garlic. When garlic is soft--about 5 minutes--add the sliced fennel, cumin seeds, fennel seeds and sumac powder. Season with sea salt and freshly ground black pepper. Cover and cook over a medium-low flame for 20 minutes. Lift the lid every so often to give everything a good stir.
Prepare the couscous. Pour couscous into a small saucepan adding 2 1/2 cups water. Bring to a simmer over a medium flame and then reduce the heat. Cook until the liquid is absorbed and the couscous is soft. This should take about 6-8 minutes. Make sure you stir the couscous every so often to prevent sticking. When the couscous is done, drizzle a little olive oil over it and season with sea salt and freshly ground black pepper.
Now, heat a wok over a large flame. You can use a large fry pan if you don't have a wok. Add some olive oil. When hot, add the carrot and capsicum. Stir and fry for a couple of minutes, then add the couscous. Stir and stir and stir. Cook for two more minutes, then add the spiced fennel and garlic--leaving out the dried chillies--and endive leaves. At this point, you'll probably find that a large pair of tongs is handy for tossing everything together. It'll only take 2-3 minutes for the endive leaves to shrivel up, at which point you can spoon this stuff onto four plates, season it with sea salt and freshly ground black pepper and dress it with a little extra virgin olive oil. I used white truffle-infused extra virgin olive oil.
Friday, January 23, 2009
Doro wot
Doro wot is an Ethiopian dish. The name translates to 'chicken stew', but rest assured this is quite different to the stews you're used of. With its thick, heavily-spiced gravy, doro wot has earned its place in the curries category of this blog, even though it's technically not a curry.
Ingredients:
2 chicken marylands (legs), skinned and cut into a few pieces, seasoned with salt
400 mL chicken stock, plus extra to liquify berbere paste
140 g tomato paste
4 cloves of garlic, peeled
2 shallots, cut into chunks
1 onion, finely sliced
1 small piece of ginger, peeled
1 tbs berbere spice mix
sea salt
ghee or oil
steamed rice, to serve
Blitz the berbere spice mix in a food processor with the shallots, garlic and ginger. Add a little chicken stock so a thick paste forms.
Fry the onion in a large saucepan over a low flame. Don't use any oil or ghee. Keep stirring to prevent sticking and/or burning. After five minutes, you can add the ghee. Too, add the berbere paste. Stir and stir and stir. Fry for five minutes more, then add the tomato paste. Stir and stir and stir again. After five minutes, add the stock. Let the gravy cook for a couple of minutes and then add the chicken pieces. Cover and cook for one hour, stirring occasionally. Serve with steamed rice.
Thursday, January 22, 2009
My berbere
Berbere is a spice blend used in Ethiopian cooking. There's no set recipe for berbere. Do a Google search and you'll find many variations. My 'recipe' is the result of much experimentation and research. An authentic berbere has many spices. Clearly, the recipes you see online that only call for three or four spices aren't even close to the real deal. My recipe, like many online, is not so much a straight berbere as it is a child of both berbere and mitmita. Real berbere contains quite a few spices you either can't get outside Ethiopia or, if you can, will have a tough time doing so. Berbere can be used as either a dry seasoning or made into a paste with shallots, garlic and ginger. Obviously you can use it in Ethiopian cooking, but it can be used for other purposes too. Experiment.
Ingredients:
8 green cardamom pods
4 pieces timiz*
1 small whole piece nutmeg
1 tbs chilli flakes
1 tbs white peppercorns
2 tsp coarse sea salt
2 tsp whole coriander seeds
2 tsp whole kororima seeds*
2 tsp sweet paprika
2 tsp whole cumin seeds
2 tsp whole ajwain seeds
1 tsp whole nigella seeds
1 tsp whole fenugreek seeds
1 tsp turmeric powder
1 tsp kosoret*
1/2 tsp cloves
1/4 tsp cinnamon
Pour everything into a small, non-stick fry pan and roast over a low flame until very pungent. Still occasionally. Note that you don't need oil or ghee. When spices are roasted, pour carefully into a mortar and pestle or electric spice grinder and grind until fine. Store in a jar, tin or zip lock bag. This stuff won't keep its flavour forever, so try and use it within a few weeks. That being said, it's best to make berbere and other spice blends a day or two before you need them. It gives the flavours and the aromas of the different spices time to get to know each other.
* I picked up timiz, kororima and kosoret at an Ethiopian grocer. I've never seen them anywhere else. Then again, I haven't looked anywhere other than the local South Asian and oriental supermarkets. If you can't find them in your local area, don't stress. Your berbere will still be ogod. Kororima is one of the most important spices in a traditional berbere. Still, don't worry if you can't find it. Just substitute the two teaspoons of kororima seeds with two teaspoons of coriander seeds. Kororima is a variety of coriander. The seeds are a slightly different shape and darker. Timiz, on the other hand, looks like a small pine cone. Kosoret is a small, crumbly, dried leaf.
The post-crab feast smell
I don't know about you, but I find the stench crabs leave in a stock pot after cooking rather offensive. Never fear, there is a way of dealing with this smell and it is very simple. All you have to do is give the stock pot a wash, then fill it up with water. Squeeze in some fresh lemon juice. Throw the lemon wedges in too. Put the stock pot somewhere out of the way so no 'helpful' soul decides to empty it. Leave overnight.
Ghee and oil
With some curries, I'll call for ghee. Ghee is clarified butter and is used in South Asian and Middle Eastern cooking in place or alongside oil. The Ethiopians make two similar products--a spiced clarified butter known as nitter kebbeh and a vegetarian product with an Amharic name that translates to 'vegetable ghee'. This 'vegetable ghee' is spiced like nitter kebbeh, but is healthier than any ghee made from butter (at least according to the packaging and the woman who runs the Ethiopian grocer I go to). Any ghee--be it Indian or Ethiopian--will suffice for curry-making. You can buy South Asian ghee in South Asian grocers and many supermarkets. You can use oil instead of ghee.
Meat and curries
In westernised Thai curries, you'll often see breast and thigh meat used. Or fillet steak. And that's lovely. These curries require thin slices of tender cuts as they cook in a short time. For other curries, though, forget these premium cuts. Go for the cheap, flavoursome cuts like lamb shanks, goat shoulder, chicken marylands (the legs) and chuck steak. These cuts are tough, yes. They are unsuitable for pan-frying, yes. You may be reluctant to use them because a voice in your head is insisting that no, Chris is wrong, the Indians are wrong, the Nepalese are wrong, the South Africans are wrong, that you should use breast instead. Using fillet steak in a beef curry is a waste of money. Meat curries typically take a while to cook. Those cheap and tough cuts of meat tenderise when simmering in a gravy over the course of a hour or two. Too, these bony cuts are gelatinous. As they cook, they thicken the gravy. I know that bony pieces of meat are hard to eat with a fork, so try eating your curry the proper way--with Indian breads. Many cultures worldwide, including the Indians, believe that food eaten with the hands tastes better. I'm not sure about that, but I do know it's much easier to manage to a goat curry if you get your hands in there. The rule of cooking on the bone also applies to seafood. Crabs and lobsters should be cooked in the shell or, if a recipe instructs you to remove the meat from the shell (and it probably shouldn't), you should still throw the shell into the gravy after giving it a quick rinse. Yeah, just like you're making a seafood stock. It'll add a lot of flavour to the gravy.
Finally, marinades. I said you should use tougher cuts of meat. If you want to tenderise these cuts somewhat before cooking, marinate the meat in something acidic like fresh citrus juice. You can also use grated ginger, as it contains an enzyme that will tenderise meat. Some Indians use the pulp of papaya to achieve similar results. You should only marinate the meat for a few hours. Leave it too long and you'll end up making the outer layer of the piece of meat soggy.
Finally, marinades. I said you should use tougher cuts of meat. If you want to tenderise these cuts somewhat before cooking, marinate the meat in something acidic like fresh citrus juice. You can also use grated ginger, as it contains an enzyme that will tenderise meat. Some Indians use the pulp of papaya to achieve similar results. You should only marinate the meat for a few hours. Leave it too long and you'll end up making the outer layer of the piece of meat soggy.
Spices
Curries might have a primary ingredient of meat, seafood, lentils, vegetables or even fruit, but surely what defines this style of cooking in the eyes of many is the combination of spices.
For those just getting into curry-making, know that you're going to have to buy many spices. Of course, you should only buy spices as you encounter recipes that ask for those specific spices. Buy small packets until you know what spices you like and what spices you most frequently use. For instance, I go through large amounts of both coriander seeds and cumin seeds. It makes sense for me to buy large bags of them. Conversely, I rarely use nigella, so I only have a small packet sitting in the cupboard. Large packets are cheaper, yes, but spices don't have an unlimited shelf life. They lose flavour and pungency over time. It's no good saving a few cents on a bag of spice if, by the time you get around to finishing it, it has long since lost its potency.
I buy most of my spices at an Indian grocer. What I can't get there I'll get at either an oriental grocer, a Middle Eastern grocer or an Ethiopian grocer. The latter I've only had to use for some really obscure spices. I don't call for these in my recipes, though, so don't worry too much if you don't have the faintest idea where the nearest Ethiopian grocer is. Incidentally, if you live in Melbourne, you can find a number of Ethiopian grocers in Footscray. An increasing number of Ethiopian and Sudanese grocers are opening in the south eastern suburbs, too. But I digress. I've found Indian grocers to have the best place to shop. Their prices are usually reasonable and their turnover is high. Classy food stores like The Essential Ingredient and Simon Johnson also stock a good range of spices, although expect to may significantly more than you would at the local South Asian place.
Always buy your spices whole. Chilli powder is okay, but about everything else--from pepper to cardamom to cumin--should be bought whole. Sure, with pre-ground spices you save a little bit of time, but the flavour and aroma is inferior. Too, whole spices have a longer shelf life. They're also easier to identify by sight. This is especially relevant in my pantry where a good half of my spice collection is unlabelled.
To maximise the flavour and aroma of spices, you should roast them before grinding them. To do this, heat a small, non-stick fry pan over a low flame. Don't use any oil or ghee. Add the whole spices. Stir with a wooden spoon to prevent them from burning. You'll know the spices are roasted when a strong and pleasant aroma fills your kitchen. Working with spices is all about using your senses.
Many recipes that use curry powder--not a spice in itself, but a blend of spices--often call for you to roast curry powder. If they don't ask you to do it, do it anyway. If the recipe calls for you to fry up some onions, add the curry powder just as the onions begin to soften and roast for a few minutes before adding the next ingredient. If you're supposed to add the curry powder to a liquid, you can roast it on its own in a small fry pan.
To grind spices, use either a mortar and pestle or an electric spice grinder. I use the former. If a recipe calls for you to grind fresh garlic, ginger or chillies, add a little coarse sea salt to the mortar (the bowl). The salt acts as an abrasive, making your job significantly easier. Too, if a recipe calls for many spices to blended together, grind them all in one go. They'll combine as you grind.
When using a mortar and pestle, there's absolutely no need to be forceful. With a granite mortar and pestle like the one I use, the pestle is quite heavy. If you're too forceful, light, round spices such as peppercorns and coriander seeds are liable to bounce out of the mortar and make a mess.
Get to know the properties of the spices in your collection. Try and reach a point where you can recognise them by sight and smell and taste. A good reference book is Ian Hemphill's Spice Notes and Recipes--it's very extensive, although I have a few spices that aren't mentioned in it. Some curry books feature decent appendices on spices. But book or no book, you should learn the properties of spices for yourself. Some spices have a strong flavour or aroma and could, if used carelessly, overpower everything else in your dish. Others you can be more generous with. Understand that not all spices are hot. Some are used to add colour to a dish. Some are sweet. Some are sour. In Indian cuisine, different curries employ different combinations of spices. Some curries are hot. Some curries are sour.
Remember that dried spices often taste different to the fresh ingredients from which they are derived. Dried chilli has a different flavour to fresh chilli. Dried garlic tastes different to fresh garlic. Dried ginger is quite distinct from fresh ginger. If you substitute the fresh for the dry or the other way round, expect a different end result.
How you store your spices is very important. Mistreat your spices and they will lose pungency and flavour. Keep them somewhere cool, dry and dark. Store them in jars or tins or thick zip-lock bags. Some South Asian grocers already sell them in the latter.
Wednesday, January 21, 2009
My bookshelf
I have a decent collection of cookbooks a wide variety of topics. That being said, I don't buy just any cookbook. I'm quite choosey. To me, a good cookbook is one that inspires me to come up with my own recipes. I like books that explain in great detail the theory behind a style of cooking, the history of a technique, the properties of an ingredient. Some of my favourite books have few, if any, illustrations. A large number of glossy photographs is not an indicator of brilliance with a cookbook. To be sure, some of the best cookbooks do have good illustrations, but similarly there are awe-inspiring cooks with none. It's the text that counts.
'If you kill an animal, it's only polite to eat the whole thing' says British chef Fergus Henderson. I couldn't agree more. Henderson, chef at British restaurant St. John, advocates working with the cheaper cuts and the offal. His two books The Whole Beast: Nose to Tail Eating and Beyond Nose to Tail: More Omnivorous Recipes for the Adventurous Cook
 are both excellent. Anyone who reckons the British can't cook should read these books. That being said, I rarely follow the man's recipes. I find them more interesting as inspirational material. My quail recipes, for instance, are all based on his roast quail recipe.
Next up is Anthony Bourdain's Les Halles Cookbook: Strategies, Recipes, and Techniques of Classic Bistro Cooking . Again, this is another inspiring book. I really like Anthony Bourdain's style--sharp writing and accessible recipes for bistro classics ranging from steak with a green peppercorn sauce to steamed mussels. While I've enjoyed most of his other works, I'm disappointed he hasn't written another cookbook.
50 Great Curries of India, Tenth Anniversary Edition is probably my favourite book on curries. I rarely follow the recipes, but use them as a basis for something of my own. The author explains the techniques essential to curry-making in a way that is accessible, but not dumbed down to the point of being useless. You'll come away from this book able to create curries that are actually respectable.
The Oxford Companion to Food 2nd Ed isn't a cookbook, as you might've guessed. It's a reference book. An encyclopaedia. It doesn't have an entry for everything you'll ever look up, but then again, no cooking encyclopaedia does. That being said, this is my favourite cooking encyclopaedia as it's all reference material. I don't buy cooking encyclopaedias to get recipes. This book is great for those of us who have a habit of picking up meat, game, poultry, seafood, vegetables and spices we happen to come across without first knowing what they are and what can be done with them.
The South African Illustrated Cookbook is my favourite, but shortest, of three South African cookbooks I own. The illustrations--yes, illustrations as opposed to photographs--are magnificent and so are the recipes. This simple, slim volume neatly sums up the diversity of South African cooking.
Pork and Sons is like a holy text to me. The pig is a noble animal. A divine beast. I'm not the first to express that sentiment and I surely won't be the last. This book, with its cute illustrations and extensive collection of recipes for every part of the pig from the loin to the foot to the blood, celebrates all that is wonderful about pig. Which is everything, of course. Has a few recipes for boar, too.
Another fascinating book is The South American Table: The Flavor and Soul of Authentic Home Cooking from Patagonia to Rio de Janeiro, with 450 Recipes . I must admit, I rarely cook the recipes in this book, but I often turn to it for ideas and because it has so much history and detail.
'If you kill an animal, it's only polite to eat the whole thing' says British chef Fergus Henderson. I couldn't agree more. Henderson, chef at British restaurant St. John, advocates working with the cheaper cuts and the offal. His two books The Whole Beast: Nose to Tail Eating
Next up is Anthony Bourdain's Les Halles Cookbook: Strategies, Recipes, and Techniques of Classic Bistro Cooking
50 Great Curries of India, Tenth Anniversary Edition
The Oxford Companion to Food 2nd Ed
The South African Illustrated Cookbook
Pork and Sons
Another fascinating book is The South American Table: The Flavor and Soul of Authentic Home Cooking from Patagonia to Rio de Janeiro, with 450 Recipes
A word on game and 'exotic' meats
You've noticed, probably, that a good many of my recipes are for game and 'exotic' meats. And that, too, when I cook with rabbit, I have a preference for wild-shot as opposed to farmed.
Now, I'm no hunter. I have nothing against hunting. Indeed, it's something I'd take up if I had the means. But I do have a certain fondness for game and, of course, for trying new things.
So where does once source all of this stuff? Obviously, with game, if you hunt or know someone who hunts, you have an obvious way of sourcing that's going to be significantly cheaper than what I'm suggesting. Too, what do they taste like?
Boar
Boar has a taste that's similar to pork, but much, much, much stronger. Boar is one of my favourite meats. Your best bet is a stew, casserole or curry.
Be warned: to buy boar is an expensive exercise. A butcher and poultry store me order it in upon request from Wangara Poultry & Game. There are probably other suppliers, though. One of the poultry stores at Queen Victoria Market occasionally stocks boar sausages that are, in my experience, just okay, but realistically you're going to have to order this a week in advance. A good butcher or poultry store should have no problems sourcing boar.
Buffalo
Buffalo really surprised me. I thought it'd be just like beef but it's not. Yes, it's similar to beef, but it's distinct enough to make it worth ordering in once in a while. Buffalo is nowhere near as strong-flavoured as kangaroo or venison, although I admit my experience with it is limited. I've only ever bought the sausages. A local butcher and poultry store can order one kilogram packs of them in through Wangara Poultry & Game. There are probably other suppliers, though. Buffalo works well with dry rubs and bold-flavoured dipping sauces. It's a lean meat, so take care to avoid overcooking it.
Camel
Yes, camel. A lot of people, right now, are probably revolted, but hang on. Camel is lovely. Forget what the beast looks like. Please. It'll be worth it. But yeah, camel. Camel tastes a bit like mutton--that is, strong-flavoured lamb--only with a very unique, sweet aftertaste. It's the sweet aftertaste that makes camel a pain to pair with sauces. Mustard doesn't work. I tried. Yoghurt-based sauces, however, are brilliant. You notice the sweet aftertaste with the steaks more than you do with the sausages. Camel curry would be lovely, but take care with your use of spices. You want spices that compliment, rather than hide, camel's unique flavour.
Camel can be bought in some butchers in the Northern Territory, I believe. I know that the butchers and poultry stores in some fresh produce markets, including Queen Victoria, sell it frozen. If you don't have any luck finding it, though, a good butcher or poultry store will be able to order it in.
Crocodile
Crocodile has a very mild flavour--somewhere between chicken and white-fleshed fish. To be honest, the taste of crocodile is a bit weak to stand up on its own. Try it in curries or as a topping on pizza.
You'll find this in the freezer section of some butchers, fishmongers and poultry stores. It can be pretty expensive. The cheapest place to buy it, usually, oriental-run fishmongers--particularly those that specialise in frozen produce. So far as I know, crocodile is only sold frozen. Unless instructed otherwise, cook from partly frozen. All the liquid you lose if you thaw it prior to cooking it is flavour.
Duck
Duck is rich and flavoursome. Fatty, yes. But that's not a problem unless you're eating it every day or are on a very strict diet. A lot of people won't cook duck because they're paranoid they'll trash it. In reality, cooking duck isn't too hard. If you're roasting it, your best bet is to roast low and slow for a while, then crank up the heat towards the end of the cooking time. If you're pan frying the breasts, you should only pan fry for a few minutes on each side and let the breasts rest on a plate, covered in al foil, in a warm place. The residual heat will cook them all the way through. It's okay to eat duck a little rare. If you're making a Thai-style curry or a stir fry with the breasts or thighs, slice them really thin so they cook quickly.
Sourcing duck is easy. Many poultry stores stock it, some supermarkets have it in their frozen produce aisle and you'll find it at many markets. Chinese supermarkets and Chinese-run butchers often sell it too. That said, I'd advise against the cheap, boiler ducks Chinese supermarkets and butchers sometimes sell. They're probably okay for a soup, but for anything else I'd spend a little more.
There are a few kinds of ducks available, from Muscovy to what's sold as Peking duck.
Emu
Emu has a strong, meaty flavour and stands up well to pretty much any sauce you'd see put with a steak--from green peppercorn sauce to red wine sauce.
Emu can be ordered from good butchers and poultry stores. It's not a cheap meat.
Goat
Tastes like lamb, pretty much. Indeed, you can use goat in most lamb recipes and vice versa. Butchers that stock goat tend to sell it as whole legs, whole shoulders or 'diced' goat, which contains a lot of bones. Sometimes you'll see chops. If you want boneless pieces, ask your butcher to chop up a shoulder. I haven't seen anyone display goat mince, but you can certainly have some goat minced up for you at any butcher that stocks it. Goat works well in curries and roasts.
Goat, thankfully, is a cheap meat. Usually, anyway. Your best bet for finding it is a butcher run by and frequented by South Asians and/or Middle Easterners. As a rule, anywhere that sells halal meat will sell goat.
Kangaroo
Depending on how you cook it, kangaroo can have a very strong, meaty flavour. If you've had a bad experience with kangaroo in the past, I urge you to try it again. Consider cooking it low and slow in a curry or pasta. Slow-cooking kangaroo dampens the smell and flavour somewhat. It still tastes stronger than beef, but it's not as overpowering as a steak that's been pan-fried or barbecued can be to the newcomer. Kangaroo is 98% fat free, making it a very healthy meat. Too, kangaroo is quite cheap. Certainly, it's gone up in recent years and some would argue that much of its appeal is lost now that you can get beef at a similar price, but remember that cheap beef is usually pretty bad.
Kangaroo is the only game meat I've seen at a regular supermarket. It's distributed by a company called Macro Meats and is sold by both Coles and Woolworth's supermarkets. You'll also find it in some independent supermarkets, butchers, fresh produce markets and poultry stores. Butchers, fresh produce markets and poultry stores will sometimes have kangaroo from other suppliers. Macro Meats' kangaroo is the cheapest, in my experience, but they don't seem to have as great a range of cuts as some of the other suppliers.
Quail
Quail has quite a flavour that's quite unique. It's certainly not a strong flavour, but by no means is it mild. And no, quail doesn't taste like chicken. Quail is a bit expensive, but it's nice to have as a treat. Quail can be partially de-boned and barbecued or broiled, or it can be roasted. It can also be cooked in stews and curries. I encourage you to do a lot of experimenting with quail. Quail can withstand a bit of punishment at the hands of the novice cook, but do try and stick to the golden rule of not overcooking stuff.
Quail can be purchased at many butchers and poultry stores.
Rabbit
Both farmed rabbit and wild-shot rabbit can be had from many butchers and poultry stores. It varies considerably in price. Don't pay what seems like a ridiculous sum for it. As a rule, wild-shot rabbit costs less per kilogram (rabbits can be sold on a per kilogram or per unit basis--it depends on the outlet), but have less meat on them and are slightly less tender than farmed rabbits. Wild-shot rabbit tastes superior to farmed rabbit, in my opinion, as it has a noticeably stronger flavour. Farmed rabbit has a chickeny taste. It doesn't taste exactly the same as chicken, but it is quite similar. Rabbit is very versatile. You can roast it or stew it, barbecue or curry it, broil or pan fry it.
Venison
Venison is a lovely meat--lean and full of flavour. When I first had it, it reminded me of very good kangaroo, although the flavour certainly wasn't as strong as kangaroo's. Because of its flavour, venison stands up well to marinades and sauces. Like emu and kangaroo, you can pair venison with about any steak sauce you care to name--from the classics to something you've invented yourself.
Now, the bad news. Venison is usually expensive. I say usually because I've found that, if I'm lucky--if the planets are properly aligned and all, if I've earned some good karma during the previous month--I can get it for a reasonable price at some oriental-run butchers. That's not to say it's as cheap as beef--although the price difference between it and good quality beef isn't significant--but it's nowhere near as bad as the prices butchers will charge you to order it in. If luck isn't on your side, you'll most likely have to order it through a butcher or poultry store. Many cuts of venison are available and you can do many things with them, from roasts to curries to stews to steaks to warm salads.
Chicken and cashew nut curry
This is a relatively mild curry that includes, yes, chicken and cashew nuts. Buy the freshest cashew nuts you can. I'm lucky enough to have a grocer near my house that sells a wide range nuts, dried beans and dried fruits at a reasonable price. His produce is always very fresh due to a high turnover. Only buy nuts from retailers that have a high turnover. The nuts sold in supermarkets are often of questionable freshness.
Too, a word on ghee. You can buy ghee in Indian grocers and some supermarkets. What I use technically isn't ghee--it's a vegetarian product from Ethiopia that's far healthier. Ethiopian 'ghee', whether it's the vegetarian stuff I have or nitter kebbeh (made in the same way as Indian ghee), contains spices so as it melts it emits the most wonderful aroma and imparts flavour into the onions, garlic and ginger. Apologies for your not being able to tell you what this stuff is called. The writing on the packaging is entirely in Amharic.
Ingredients:
2 chicken marylands (legs), separated into thighs and drumsticks, skin removed
400 mL coconut cream
100 g unsalted cashew nuts
10 curry leaves
10 dried Kashmiri chillies
6 cardamom pods, ground
6 cloves garlic, minced
4 cloves, ground
1 onion, diced
1 tomato, diced
a piece of ginger, diced
a piece of a cinnamon quill, ground
2 tbs hot curry powder
1 tbs ghee (substitute the Ethiopian stuff I use or regular oil)
1/4 tsp tandoori colouring
freshly ground black pepper
sea salt
steamed rice, to serve
Season the chicken pieces with sea salt and freshly ground black pepper.
Melt some ghee in a large saucepan. Fry the onion, garlic, ginger and dried chillies over a low heat for five minutes. Add the curry powder, cinnamon, cloves and cardamom. Stir and fry for five minutes. Add a little more ghee if it looks like it's going to dry out. Add the tomato. Fry for another five minutes and add the chicken. Stir so the chicken is well covered by the spiced tomato and onion. Fry for a further five minutes. Add coconut cream and tandoori colouring. Cover pan and simmer for 45 minutes, stirring occasionally. Remove the lid and simmer for five minutes before adding the curry leaves. Simmer for ten more minutes and serve.
Tuesday, January 20, 2009
Chicken vindaloo
Real vindaloo is traditionally made with pork or duck. I've previously provided a recipe that uses pork's wild cousin. It was significantly milder than this one is, so you can use the spices from that recipe in this recipe if you're not too keen on feeling the heat. And yes, you can substitute the chicken for duck.
Ingredients:
2 chicken marylands (legs), split into thighs and drumsticks, skinned
10 dried Kashmiri chillies
10 curry leaves
4 cloves of garlic, peeled
3 cloves
1 onion, sliced
1 small lump of ginger, peeled
1 small shard snapped from a cinnamon quill
1 star anise pod
1 tomato, diced
1 tsp brown sugar
1 tsp cumin
1 tsp poppy seeds
1 tsp sweet paprika
1/2 tsp mustard seeds
apple cider vinegar, as necessary
freshly ground black pepper
sea salt
oil
steamed rice, to serve
Soak the dried chillies in water to soften them. Season the chicken pieces with freshly ground black pepper and sea salt and set aside until needed.
Heat a generous splash oil in a saucepan. Fry the onion over low heat for ten minutes or until soft. Meanwhile, grind the cumin, star anise, cinnamon, and cloves in a mortar and pestle. Transfer the ground spices to a food processor and blitz along with the garlic, ginger, poppy seeds, paprika, mustard seeds and softened chillies. Gradually add the the apple cider vinegar, stopping when a thick paste forms.
When the onions are soft, add the tomato and the paste to the saucepan and fry for five minutes, stirring constantly. If the paste seems like it's drying out, add a splash of apple cider vinegar. Add the chicken and cook for five minutes. Add 600 mL water and the brown sugar and cover the saucepan. Simmer for 55 minutes, stirring occasionally. Remove the lid and add the curry leaves. Simmer for a further 5 minutes and serve.
Rice is obviously a nice accompaniment, as are Indian breads and yoghurt.
Sunday, January 18, 2009
Curry of goat and vegetables
You could, of course, use lamb for this recipe. But so long as you have access to goat--available at any butcher that seriously caters to folks of South Asian, East African or Caribbean descent--you should try it. It's a lovely meat, similar in flavour to lamb. You could use mutton too, I suppose. Whatever you end up using for the meat, buy on-the-bone. Meat-on-the-bone tastes better and is more fun to eat. What's that? It's hard to eat with a fork? Well, curry wasn't meant to be eaten with a fork!
Ingredients:
500 g diced goat, on-the-bone
1/2 cup plain yoghurt
4 cloves garlic, peeled
4 green cardamon pods
2 sticks of celery, roughly chopped
1 aubergine/eggplant, roughly chopped
1 carrot, roughly chopped
1 onion, cut into chunks
1 tbs chilli powder
1 bunch fresh coriander/cilantro
1 tbs coriander seeds
1 tbs cumin seeds
1 tbs fennel seeds
1 tbs nigella/black cumin
1 tbs turmeric powder
1 tsp fenugreek seeds
1 tsp salt
1 tsp sweet paprika
oil
apple cider vinegar, as necessary
steamed rice, to serve
Coarsely the cardamom pods, coriander seeds, cumin seeds, fennel seeds and fenugreek seeds with a mortar and pestle. Pour into the food processor, along with the onion, garlic and a couple of tablespoons worth of coriander stalks (retain the leaves for later). Blitz, gradually adding apple cider vinegar until a paste forms. How much apple cider vinegar you'll need depends on the size of the onion, the size of the garlic, the direction of the wind, the thickness of your nostril hairs, the position of Saturn in relation to the patch of grass your goat last grazed on and various other factors.
Over a low flame, heat a generous splash of oil in a large saucepan. When oil is hot, add the curry paste and fry for 5 minutes or until it noticeably darkens. Add the pieces of goat and stir so they get covered in the paste. Fry for 5 minutes, ensuring that you keep moving everything around. Otherwise you'll end up with burnt curry paste. Add 3 cups of water, cover the saucepan and cook for 1 hour and 30 minutes, stirring occasionally. At this point, add the aubergine/eggplant, carrot and celery and cook for a further 30 minutes. Remove lid, take off heat and slowly stir in the yoghurt. Garnish with the coriander leaves.
Serve with steamed rice.
Spaghetti with a spicy kangaroo and mushroom sauce
Kangaroo mince is wonderful. Cheap, lean and tasty. It works well in pasta sauces. You could use it in place of beef in bolognese, if you wanted. This, of course, isn't bolognese. Bolognese--real, honest-to-God bologonese--includes at least two meats. Mine includes four. More if you count the plethora of pig-related products I throw in in addition to the mince.
Too, the addition of curry powder. Adding curry powder to a meaty pasta sauce, for me, is a nostalgic thing. My father used to do with his heavily Australianised 'bolognese' and to this day I can remember the smell of the stuff wafting through the house on the one evening a month or so he'd be in the kitchen.
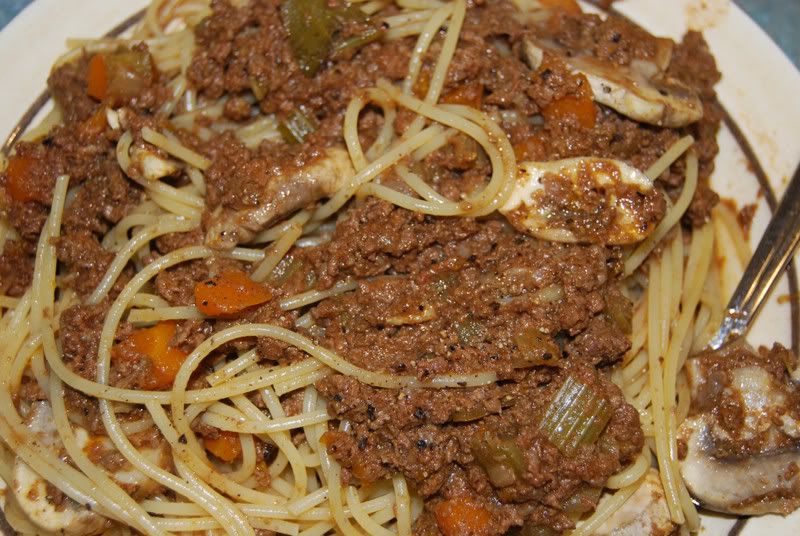
Ingredients:
600 g kangaroo mince
500 mL beef stock
handful of mushrooms of your choosing, sliced
100 g tomato paste
1/3 cup brandy
4 cloves garlic, minced
2 celery sticks, diced
2 chillies, diced
1 carrot, diced
1 large onion, diced
1 1/2 tbs hot curry powder
freshly ground black pepper
sea salt
In a large sauceheat, heat some oil over a low flame. Add the onion, garlic, chillies, celery and carrot. Stir and fry for five minutes, then add a tablespoon of curry powder. Stir and fry for another five minutes, then add the mince. Stir well. Brown the mince over the course of 2-3 minutes, then add the brandy, stirring as you do. Let it reduce, then spoon in the tomato paste. Stir it in, add the stock and cover the pan. Simmer for 1 1/2 hours, stirring occasionally. Remove the lid. Stir in the remaining curry powder. Simmer for a further 25 minutes, then add the mushrooms. Simmer for five more minutes, then cover the pan and take it off the heat. Let it sit this way while you bring some lightly salted water to the boil and cook some spaghetti. Don't cook the spaghetti according to packet instructions--use your senses by tasting the pasta when you think it's about done. It should be soft, but have just a little bite to it. Al dente. Toss the pasta and sauce together.
Friday, January 16, 2009
Potato wedges, Indian style
This twist on potato wedges isn't as loopy an idea as you may initially think. It was inspired by a recipe in one of my favourite cooking books, Camellia Panjabi's 50 Great Curries of India. This little book has done more than any other to increase my understanding of Indian cuisine and curries.
Anyway, enough praise for Ms. Panjabi's writings. She has a recipe for potatoes that are briefly boiled in turmeric-infused water and then fried in chilli- and coriander-infused oil. While her method of cooking is the undeniably more authentic way of preparing Indian 'potato wedges', I prefer to roast my potato wedges.
Ingredients:
500 g small potatoes, cut into wedges
4 cloves garlic, crushed
1 tsp chilli powder
1/2 tsp amchoor (mango powder)
1/2 tsp coriander, freshly ground
1/2 tsp garam masala
1/2 tsp hot curry powder
1/2 tsp mustard seeds
1/2 tsp sweet paprika
1/2 tsp turmeric powder
sea salt
oil
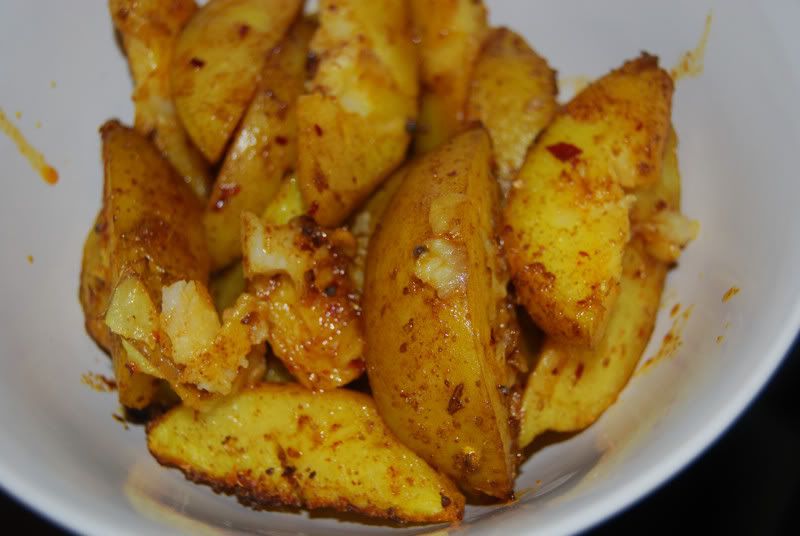
Pre-heat oven to 220*C.
Place the potatoes, tumeric and a pinch of sea salt in a saucepan. Add water to cover and bring to boil. Simmer for 7-8 minutes or until potatoes can be easily speared with a skewer.
Meanwhile, prepare the seasoning. Combine all of the spices, plus a little sea salt, in a cup or other small vessel. Lightly oil an oven tray and scatter the crushed garlic cloves over it. When the potatoes are able to be speared with a skewer, take them off the heat and drain. Add the potatoes to the tray. Toss in the oil and spice mix. Roast for 20-25 minutes, turning every so often.
Simple, perfect calamari
Generally, I don't go for deep-fried foods. I mean, okay, a bowl of good, hand cut frites is one of my favourite things in the world. But when it comes to meat and seafood? I don't want my fish fillets deep-fried. I don't want my chicken drumsticks deep fried. And I certainly don't want my calamari deep-fried. Personal taste and all, I guess.
I pan fry or barbecue my calamari and I urge you to try doing the same. This recipe is based upon a River Cottage recipe, so props to Hugh Fearnley-Whittingstall for the idea.
The secret with calamari is to not overcook it. I mean, I can't emphasise this enough. Prepare squid the right way and it'll be amazingly tender. Overcook it even a little and it'll be tough. Inedible, even.
Ingredients:
1 fresh squid
2 cloves garlic, finely minced
2 small chillies, finely diced
1 lemon, quartered
freshly ground black pepper
oil
Prepare the squid by chopping off the head. Discard the beak. Hang on to the tentacles--you can fry or barbecue them too and they'll be lovely, so long as you don't overcook them. Please.
Carefully open the body with a knife and lay it out flat. There might be a large sack of goo--that means the squid was knocked up, I think--which should be discarded. Use a paper towel to remove the thin, clear membrane from what used to be the body's internal wall. Cleaning squid is a quicker and easier process than cleaning fish (supposing you clean your fish dry).
Once the squid is clean, use the tip of a sharp knife to score a criss-cross pattern into one side of the flesh. Be careful. Be gentle. You're not trying to slice the poor thing into ribbons here. The goal is to make 'trenches' in the flesh that will catch the pieces of chilli and garlic.
When the squid has been scored, cut it into thick strips. Rub the chilli and garlic and freshly ground black pepper into the 'trenches'. Smear the squid with a little oil and place in the fridge, covered, for a hour or two to let the flavours develop.
Pre-heat a pan or barbecue to really hot. 'Really hot' as in smoking hot--the same temperature you'd get it to if you wanted to give a piece of steak a lovely, crispy coating. Place the squid pieces, scored side up, into the pan. Squeeze lemon juice over them. After 45 seconds, flip them over. Squeeze lemon juice over them. They'll start to curl up. After 45 seconds, flip them over again for 30-45 seconds, ensuring the part that curled cooks properly. Squeeze lemon juice over them and remove from the pan.
Mild curry of chicken wings
This is a very mild curry using my favourite cut of chicken, the wing, as the primary ingredient. If you want, you can add a little fire to this curry by adding either some more fresh chilli or a teaspoon of chilli powder to the paste. Too, if you're not a fan of wings, you could always use drumsticks or chops. Anything with a bone is good.
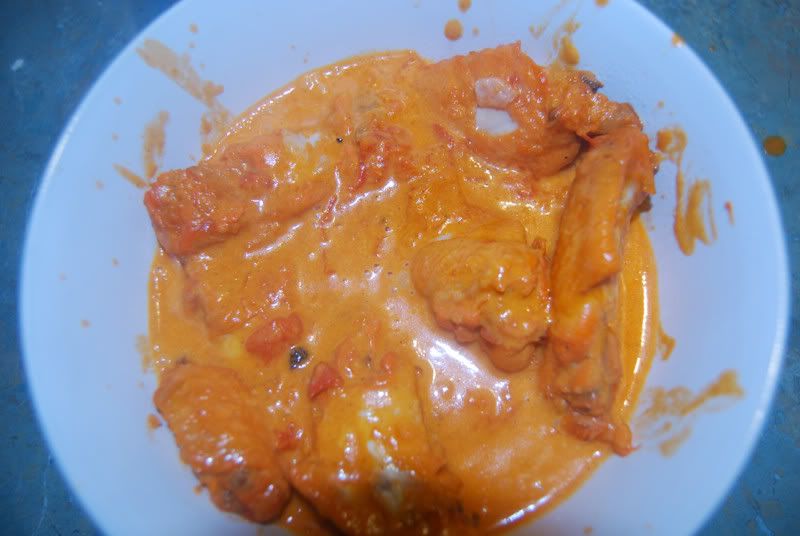
Ingredients:
1 kg chicken wings, halved at the joint and tips removed
800 mL coconut milk
8 whole black peppercorns
4 garlic cloves, peeled
3 small chillies, stems removed
2 tomatoes, diced
1 large onion, cut into chunks
1 small lump of ginger, peeled
1/2 cinnamon stick, snapped into small pieces (this is very important or you'll trash your food processor)
1 tsp apple cider vinegar, plus extra to form curry paste
1 tsp coriander seeds
1 tsp sesame seeds
1/2 tsp cardamon powder
1/2 tsp cumin seeds
1/2 tsp garam masala
1/2 tsp hot curry powder
1/4 tsp tandoori colouring
sea salt
oil
steamed rice, to serve
Place the chillies, garlic, ginger, onion, cardamon, cinnamon, coriander, cumin, sesame seeds, curry powder and tandoori colouring in a food processor. Blitz, slowly adding apple cider vinegar until a paste forms.
Season the tomatoes generously with salt.
Heat a generous splash of of oil in a large saucepan over a medium flame. When hot, add the paste and fry for five minutes. Add the chicken wings and cook for five minutes, stirring constantly to ensure the wings get an even coating of paste. Add the tomatoes and stir. Cook for a further five minutes. Add the coconut milk, apple cider vinegar and garam masala and bring to a simmer. Cook for 25-30 minutes. You may not want to serve all the gravy.
Thursday, January 15, 2009
Fishy smells and slime - a buyer's guide
Looking at my StatCounter page, I'm surprised at the amount of people Googling for things like, 'My steamed crab tastes like ammonia. That's okay, yeah?'
So. Some tips. Raw seafood should smell like the ocean. Fish, prawns, crabs and their brethren should look as if they've just been taken from the water. You've been fishing, right? Freshly caught fish don't smell overly 'fishy', do they? Fish bought at the shops shouldn't either. And they certainly shouldn't smell like cleaning products. Fish shouldn't be slimy, either.
I don't know about where you live, but I live close to a few fishmongers. If I ever walk in to a place and instantly feel my stomach turn because the place reeks to high heaven, I turn around and leave. Forget what the sales assistant says. If the seafood that's on display has a really strong smell, it's not fresh. Don't waste your money. Find another fishmonger.
In the case of crabs, lobsters and other crustaceans, try and find a fishmonger that sells them live. When crabs and lobsters die, they rapidly decompose. Something you kill immediately before or during the cooking process will taste better. Too, when you buy something live, you know it's fresh. When buying live crabs and lobsters, look for the ones that are really feisty. If they're just sulking at the bottom of the tank, pick another. Lobster and crab aren't cheap, generally, so be fussy. If a fishmonger is only selling rubbish, he doesn't deserve your money. Don't be so fixated on the idea of having lobster for dinner that you ignore the tell-tale signs of poor quality.
With prawns, buy whole, uncooked prawns. Buy whole fish in generally, really. It's easier to see if it's fresh. The eyes should be clear. And yeah, as I said, the fish should look as if it's just been pulled from the water. Note that some fishmongers will sell live fish--'live' as in they'll kill it to order. That's maybe the best way, aside from catching the fish yourself, of ensuring what you're buying is fresh.
With oysters, only buy them if you see them being shucked on site. Oysters will keep for about a week in the fridge, but they're better when they're freshly shucked. In the ideal world, you'd buy an oyster knife and learn to shuck them yourself.
Too, if you live in an area with a lot of oriental immigrants, consider yourself blessed. The Japanese, Chinese and Vietnamese eat a lot of seafood. There should be a lot of places catering to that market. Pay attention to what the grandmothers buy. If you see a few old biddies take one look at the snapper and walk away, shaking their heads in disgust, it's probably best to follow their lead and avoid the snapper.
There are too many terrible fishmongers around, foisting rubbish onto unsuspecting and ignorant customers. Whether you're intending on buying cheap, 'trash' fish like skate or premium stuff like lobsters and mud crabs, you must be fussy. Don't accept rubbish. If you get burnt by a business, don't give them a second chance. Surely someone else is more willing to provide you with quality produce.
Unless you're buying frozen seafood, when you buy is important. Never buy seafood on a Sunday, Monday or the day after a public holiday. Fishermen work from Monday to Friday. Friday's catch arrives in stores on Saturday morning. Therefore, what you buy on Monday arrived in store on Saturday morning. Yes, I know, some seafood--mussels, say--lasts 'a while' in the fridge, but the quality quickly deteriorates. As a rule, buy fresh seafood only on the day you're intending on using it.
When it comes to handling seafood, perhaps the most important thing to remember is to not wet the seafood. The last time fish should come into contact with water, unless you're poaching, is when they're taken out of the river or the sea. When filleting and gutting a fish, you should do it dry. Cleaning a fish the dry way is a slower process, but it produces better results. Washing out the gut cavity gets rid of all the natural oils in the fish's flesh. And those oils are flavour. Be wary of fishmongers who, when asked to clean a fish, hold the poor thing under running water while they work.
When pin boning fish fillets or cutlets, it's important to use tweezers. Your fingers will simply make a mess of the job. Dedicate a pair of tweezers to the task or buy a specialist pin boning tool. Some fish mongers may take care of this task for you.
Don't write off seafood that's frozen or somehow preserved. Crocodile, while arguably more game meat than seafood, is always sold frozen. Scampi is generally sold frozen. And it's fine. Really. Too, put aside your experiences with the canned seafood you've picked up in supermarkets in the past, as canned tuna from Spain is very good and works well as a filling in savoury pastries. Indeed, this is the same canned tuna used in tapas bars in Spain. That being said, most canned seafood is rubbish.
Subscribe to:
Posts (Atom)

